


Blogs
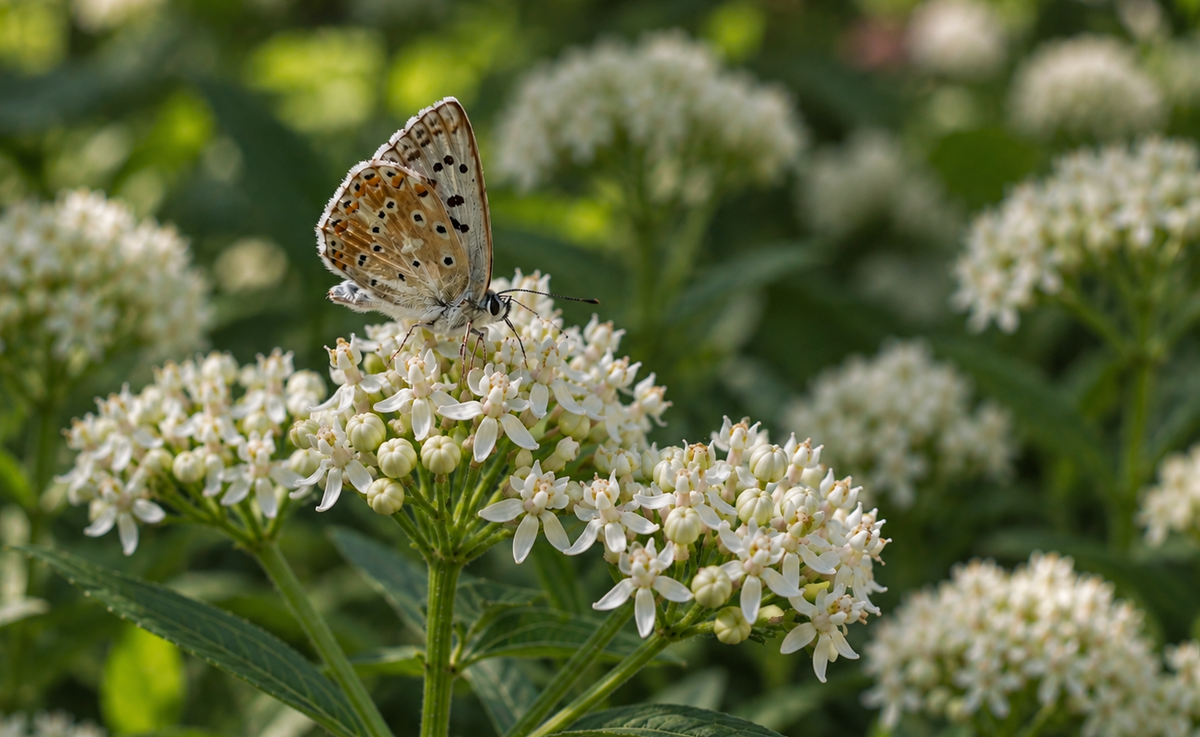

Beneficial Insects for Pest Control: Helpful Bugs for Your Garden
Finding aphids, thrips, fungus gnats, or spider mites on your plants can make you want to reach for a spray bottle right away. Before you do, take a closer look at what is already living in your garden. Ladybugs, lacewings, predatory mites, and other beneficial organisms feed on common garden pests. They can be a useful part of Integrated Pest Management (IPM), especially when you want to manage pests without relying heavily on broad-spectrum sprays. At Blossomdale, we use ladybugs, Neoseiulus cucumeris mites, minute pirate bugs, Steinernema feltiae (SF nematodes), and lacewings as part of our safe growing practices. What Are Beneficial Insects? Beneficial insects are simply insects that do something useful in the garden. Some hunt plant pests, others act as parasitoids, and many help pollinate flowers. There are also beneficial organisms that aren't insects at all. Nematodes, for example, are microscopic roundworms that can help control certain soil pests. Together, these organisms form an important part of natural beneficial bugs for pest control. Why Use Beneficial Bugs? Beneficial bugs give gardeners another way to deal with pests. Depending on the species, they can: Eat common plant pests: Ladybugs love aphids, while predatory mites target tiny pests such as thrips. Reduce the need for sprays: Targeted biological controls can help you avoid reaching for broad-spectrum insecticides every time you spot a pest. Reach pests in hard-to-treat places: Beneficial nematodes work in the soil, while predatory mites hunt on plants. Support pollination and biodiversity: Some beneficial insects control pests, while others help pollinate flowers. The trick is knowing which beneficial organism works against the pest you're dealing with. The 4 Main Types of Beneficial Organisms 1. Predators: The Garden Hunters Predators do exactly what their name suggests: they hunt and eat other insects. Ladybugs and ladybug larvae Ladybugs are famous for eating aphids, and their larvae can be just as useful. Ladybug larvae look nothing like the familiar round adults, so don't be too quick to remove them from your plants. Lady beetles and their larvae are important natural predators of aphids and other common garden pests. Green and brown lacewing larvae Often called "aphid lions," lacewing larvae go after aphids, thrips, whiteflies, mites, and insect eggs. Adult lacewings mainly feed on nectar, pollen, and honeydew. Lacewing larvae are particularly effective predators of soft-bodied pests. Minute pirate bugs (Orius) These tiny insects pack a punch. They feed on thrips, spider mites, aphids, and insect eggs and are especially useful when thrips are causing trouble. Predatory mites (Neoseiulus cucumeris) These microscopic mites are commonly used against thrips larvae. They're useful when you're dealing with pests that are small enough to escape notice during a quick plant inspection. Hoverfly larvae Many hoverfly larvae feed on aphids and other soft-bodied insects. The adults are useful pollinators, too. 2. Parasitoids: Small Insects With a Specific Job Parasitoids work differently from predators. They use another insect as a host while developing. Parasitic wasps Many parasitic wasps are tiny and harmless to people. Different species target different pests, including aphids, caterpillars, and whiteflies. If you've ever seen a swollen, brown aphid stuck to a leaf, you may have spotted an "aphid mummy." It can be a sign that a parasitic wasp is already doing its job. Tachinid flies Tachinid flies target various insects, including caterpillars and beetles. Their larvae develop on or inside the host. 3. Soil Allies Some useful organisms spend their time below the surface. Beneficial nematodes Steinernema feltiae, or SF nematodes, are microscopic roundworms that can help control fungus gnat larvae and other susceptible soil pests. Earthworms and springtails Earthworms help improve soil structure and move organic matter through the soil. Springtails help break down decaying material and contribute to the soil food web. 4. Pollinators Some beneficial insects aren't interested in eating pests at all. Native bees, bumblebees, and hoverflies help pollinate flowers, which is essential for many plants that produce fruit and seeds. Beneficial Insects for Pest Control: Which Ones Eat Which Pests? Not every beneficial bug works on every pest. Here's a quick way to match them up: Common Garden Pests and Their Natural Predators Common Pest Beneficial Organisms Aphids Ladybugs, lacewing larvae, hoverfly larvae, parasitic wasps Thrips Minute pirate bugs, Neoseiulus cucumeris Fungus gnats Steinernema feltiae nematodes Spider mites Predatory mites, minute pirate bugs, lacewing larvae Whiteflies Lacewing larvae, ladybugs, parasitic wasps Caterpillars Lacewing larvae, parasitic wasps, tachinid flies The best beneficial bugs for pest control depend on the pest. Identifying what's actually eating your plant before releasing anything will save you time and money. Friend or Foe? Common Beneficial Insect Look-Alikes Not every creepy-looking insect is a garden pest. A few common look-alikes are worth knowing. Ladybug Larva vs. Colorado Potato Beetle Larva Ladybug larvae have long, spiny-looking bodies and may look intimidating. Colorado potato beetle larvae are plumper and commonly feed on plants such as potatoes, tomatoes, and eggplants. If you spot an unfamiliar insect, identify it before removing it. Hoverfly vs. Wasp Hoverflies often mimic the coloring of bees and wasps. One easy way to tell them apart is by their wings: hoverflies have one pair, while wasps have two. Hoverflies don't sting, and their larvae can help control aphids. Cucumeris Mites vs. Spider Mites These mites are tiny, so you'll probably need magnification to tell them apart. Predatory cucumeris mites move quickly and don't create the fine webbing associated with spider mites. How to Attract Beneficial Bugs to Your Garden You can encourage beneficial insects by making your garden a place where they can find food, water, and shelter. 1. Plant an Insectary Strip Plant groups of nectar- and pollen-rich flowers rather than relying on a single flowering plant. Sweet alyssum, yarrow, dill, cosmos, and native wildflowers can provide food for adult beneficial insects and pollinators. Planting flowers that bloom at different times also gives them a more consistent food source. Providing pollen and nectar throughout the growing season is one way to encourage beneficial insects to stay in the garden. [productList] 2. Provide Shelter and Water Beneficial insects need places to hide, reproduce, and overwinter. Leave some leaf litter and natural plant debris where appropriate, and consider adding shallow water sources such as a simple bug puddler. 3. Be Careful With Sprays Broad-spectrum insecticides can affect beneficial insects along with the pests you're trying to control. When treatment is necessary, identify the pest first and choose the most targeted option available. Follow the product label carefully, and avoid spraying when pollinators and other beneficial insects are actively visiting flowers. Can You Use Beneficial Insects on Indoor Plants? Yes. Some beneficial organisms can be used indoors, depending on the pest you're dealing with. For beneficial insects for indoor plants, options such as Neoseiulus cucumeris and beneficial nematodes may help with certain pests. Start by identifying the pest. Then check that the organism you're using is appropriate for that particular pest and growing environment. How to Release Beneficial Insects Releasing beneficial insects is pretty straightforward, but timing and conditions matter. Identify the pest first. This tells you which organism to use. Release at a suitable time. Early morning or evening can help protect insects from intense heat and sunlight. Prepare your plants. Make sure they have suitable moisture and growing conditions. Keep soil moist when using SF nematodes. Follow the product instructions and maintain the recommended moisture afterward. Give predators something to eat. If there are no suitable pests around, predators may have difficulty establishing. And don't expect overnight results. Biological pest control works over time. Building a Healthier Garden With Beneficial Bugs A garden doesn't have to be completely free of insects to be healthy. Some of those insects may be doing valuable work right on your plants. The best beneficial bugs for plants depend on what you're growing and which pests you're dealing with. Once you learn to recognize the helpful ones, you may find yourself reaching for your magnifying glass before your spray bottle. At Blossomdale, we use ladybugs, cucumeris mites, minute pirate bugs, SF nematodes, and lacewings as part of our growing practices. Explore Blossomdale's plant collection and find plants for your garden.
Learn more
Yoder Mums: Growing, Care & Winter Guide
Yoder MumsChrysanthemum × morifolium Yoder mums are popular garden mums known for their rounded growth, dense foliage, and abundant fall flowers. Available in a wide range of colors and varieties, they can brighten up garden beds, borders, and containers as summer comes to an end. Unlike florist mums, Yoder garden mums are bred for outdoor growing and can be grown as perennials in suitable climates. With the right planting time and care, they can return year after year rather than being treated as a one-season flower. [productList] Quick care overview Botanical NameChrysanthemum × morifolium Common NamesYoder Mum, Garden Mum, Hardy Mum, Fall Mum Plant TypeHerbaceous Perennial Mature Size12–24 in. tall, 18–36 in. wide Sun ExposureFull Sun (6–8 hrs daily) Soil TypeRich, well-draining soil MoistureModerate; keep evenly moist Bloom WindowLate Summer through Late Fall Flower ColorsPink, Yellow, White, Red, Orange, Purple, Green Hardiness ZonesUSDA Zones 5–9 Special TraitsNaturally Compact, Rounded Growth, Dense Branching, Light Pinching Optional Pet SafeNo If you're growing Yoder mums for the first time, here's what to know about planting, watering, pruning, overwintering, and keeping them blooming. Garden mums vs. florist mums: what's the difference? Garden mums and florist mums are both chrysanthemums, but they are grown for different purposes. Garden mums are selected for outdoor performance and are more suitable for growing in the landscape, while florist mums are primarily produced for indoor or short-term decorative use. Yoder® mums are garden mums developed for outdoor displays. Syngenta's Yoder mum families include varieties with different flower forms, colors, plant habits, and bloom timing, giving growers plenty of options for fall combinations. That distinction matters if you're hoping to keep your mum beyond the fall season. A garden mum gives you a better starting point for growing a perennial plant, although winter survival still depends on growing conditions and climate. Perennial habit & hardiness zones Are Yoder mums perennials? Will they come back next year? Yes, Yoder mums are herbaceous perennials when grown in suitable conditions. Yoder mums are perennial in USDA Zones 5–9, although they are also commonly grown as seasonal annuals for their fall color. If you want your Yoder mum to come back, planting it in the ground gives the roots more protection than leaving it in a small seasonal container. Good drainage is especially important because consistently wet soil can lead to root and crown problems. Keep in mind that being labeled perennial does not guarantee that every plant will survive every winter. Temperature, moisture, planting conditions, and the plant's overall health all affect winter survival. What zone do mums grow best in? Yoder mums are listed as perennial in USDA Zones 5–9. Your local winter conditions still matter, particularly if you want the plant to survive and return each year. In colder areas, protecting the plant's root crown through winter can improve its chances of returning in spring. In warmer regions, the bigger concern may be keeping the soil well drained rather than protecting the plant from extreme cold. When should you plant mums: spring or fall? Spring is generally the better time to plant Yoder mums if you want them to establish and return the following year. Planting earlier gives the roots more time to grow before winter arrives. Fall planting can still work, especially when you're buying mums already in bloom, but the plant has less time to establish its root system before cold weather. If you're treating the mum as a seasonal fall display, however, planting in fall is an easy way to add immediate color. Yoder mums can also be grown in containers for seasonal displays. Syngenta's growing information includes Yoder mum combinations specifically designed for containers and fall displays. Sun & water needs How much sunlight do Yoder mums need? Yoder mums grow best in full sun, with about 6–8 hours of direct sunlight each day. Plenty of light encourages fuller growth and more abundant flowering. A sunny garden bed is ideal, but Yoder mums can also work well in containers placed on a bright patio, porch, or other sunny location. Too much shade can result in weaker, leggier growth and fewer flowers, so choose the sunniest practical location you have. How often should you water Yoder mums? Water Yoder mums regularly enough to keep the soil evenly moist without leaving it waterlogged. They need consistent moisture during active growth and flower development, but overly wet soil can cause problems with the roots. Check the soil before watering rather than following a rigid schedule. Container-grown mums may need water more frequently because their soil dries out faster than garden beds. Are Yoder mums poisonous to pets? Yes. Chrysanthemums are considered toxic to pets, so Yoder mums should be kept away from dogs and cats that may chew on the plant. Can you root mum cuttings or grow Yoder mums from seed? Mums can be propagated from cuttings, but growing a specific Yoder mum from seed will not necessarily produce an identical plant. Named Yoder varieties are selected cultivars, so buying a live plant is the more reliable option when you want a particular variety. Yoder mums are available in numerous named varieties and families, including selections such as Tracy Orange and other color forms. Syngenta's Yoder material also shows how different varieties can be combined based on their plant habit, timing, and flower characteristics. Do mums need pruning? How do you pinch Yoder mums? Yoder mums can be lightly pinched during active growth to encourage a fuller, more compact shape, but the exact approach depends on the variety and how you're growing the plant. Some Yoder mums naturally develop a rounded, well-branched form, so heavy pruning isn't necessarily needed. We recommend light pinching in early summer to encourage a denser shape. Once the plant has finished flowering, don't cut it all the way back immediately if you're trying to overwinter it. Leaving the above-ground growth in place through winter can help protect the crown. The old growth can then be cut back in early spring before new growth emerges. How do you deadhead mums and get them to bloom again? Deadheading removes faded flowers and keeps the plant looking tidy, but it does not guarantee that a mum will immediately rebloom. Yoder mums naturally flower as days become shorter, so their main display is typically concentrated in late summer and fall. For container mums, remove spent flowers as they fade to keep the plant looking fresh. Continue providing adequate sunlight and moisture while the plant is actively growing. If the goal is to have the plant flower again the following year, focus less on forcing another immediate flush of flowers and more on keeping the plant healthy through winter. How do you keep Yoder mums alive all year? The best way to keep a Yoder mum alive year-round is to grow it as a perennial in a suitable climate, provide well-drained soil, and protect the plant through winter. After flowering, leave the old stems and foliage in place through winter rather than cutting the plant down immediately. In early spring, cut the old growth back to the ground before new shoots begin emerging. If your mum is growing in a container, winter protection becomes more important because the roots are exposed to temperature changes more quickly than plants growing in the ground. Why are my Yoder mums dying or turning brown? Brown leaves, wilting, or declining growth can often be traced back to watering or soil conditions. Check these areas first: Soil staying wetPoor drainage can contribute to root and crown problems. Dry soilMums need consistent moisture during active growth and flowering. Too much shadeInsufficient sunlight can lead to weak growth and reduced flowering. Winter damageCold temperatures and wet winter soil can make it harder for a plant to survive. Container stressPotted mums can dry out faster than plants growing in the ground. If the soil is consistently wet, improve drainage before simply adding more water. Yoder mums prefer moist soil, but they do not do well in continuously waterlogged conditions. Yoder mums are a practical choice if you want the classic abundance of fall chrysanthemums with the potential to grow them as perennials. Give them plenty of sun, consistent moisture, and well-drained soil, and choose an appropriate planting location if you want them to return next year. For seasonal color, they also work beautifully in containers and mixed fall displays. If you're ready to grow Yoder mums in your own garden, explore available Yoder Mum varieties at Blossomdale. Shop Yoder Mums →
Learn more
Butterfly Weed (Asclepias tuberosa): Growing, Planting & Care Guide
Looking to add vibrant, long-lasting color to your garden while supporting local wildlife? Butterfly weed (Asclepias tuberosa) is a high-impact North American native perennial that produces vivid clusters of neon-orange flowers from late spring through summer. As an essential host plant for Monarch butterfly and a rich nectar source for bees and native pollinators, this drought-tolerant species belongs in every eco-friendly landscape. Despite its striking appearance, butterfly weed is remarkably low-maintenance once established, thriving in dry, sunny spots where other perennials struggle. Quick Care Overview Botanic Name: Asclepias tuberosa Common Names: Butterfly Weed, Orange Milkweed, Pleurisy Root Plant Type: Herbaceous Native Perennial Mature Size: 1.5–3 ft. tall, 1.5–2 ft. wide Sun Exposure: Full Sun (6+ hours daily) Soil Type: Dry to medium, well-draining (sandy, gravelly, poor soils) Soil pH: Slightly acidic to neutral (5.8–7.2) Bloom Time: Late Spring to Late Summer Flower Colors: Bright Orange, Yellow, Reddish-Orange Hardiness Zones: USDA Zones 3–9 Special Traits: Monarch Host Plant, Drought-Tolerant, Clear Sap (No Milky Latex) [productList] What Does Butterfly Weed Look Like? Butterfly weed is a compact, bushy perennial growing 1 to 2 feet tall with narrow, lance-shaped green leaves arranged alternately along sturdy stems. It grows from a deep, thick taproot and produces several upright stems from a central base. Small, five-petaled flowers grow in dense, flat-topped clusters (umbels) at the ends of the stems. After flowering, the plant forms long, narrow seed pods. As these pods mature and split open in autumn, they release flat brown seeds attached to silky white hairs that drift on the wind. Identification Tip Unlike most plants in the milkweed family (Asclepias), butterfly weed does not produce a thick milky sap when stems or leaves break. Its sap is clear. What Are the Colors of Butterfly Weed? While bright neon-orange is the standard color for Asclepias tuberosa, naturally occurring yellow cultivars (such as 'Hello Yellow') and deep reddish-orange forms exist. These bright blooms pair exceptionally well with blue and purple perennials like Salvia, Russian Sage, and Purple Coneflower. What Does Butterfly Weed Symbolize? In floral folklore, butterfly weed symbolizes transformation, hope, health, and freedom. This symbolism stems directly from its vital ecological relationship with the Monarch butterfly, representing spiritual rebirth and the journey of metamorphosis. Benefits, Safety & Lifespan What Are the Benefits of Butterfly Weed? Essential Monarch Host PlantProvides vital food for hungry Monarch butterfly larvae (caterpillars). Pollinator MagnetDelivers rich nectar to bees, native butterflies, and hummingbirds. Drought & Heat TolerantDeep taproots allow mature plants to thrive in extreme heat with minimal watering. Low MaintenanceRequires zero fertilizer and tolerates poor, sandy, or rocky soils. Non-Invasive NativeAdds reliable perennial color across USDA Zones 3–9 without aggressive garden overtaking. Is Milkweed Poisonous to Touch? Handle with care Butterfly weed is safe to handle, but its leaves and stems should never be ingested. Like all milkweeds, it contains cardiac glycosides that make the plant toxic to livestock, dogs, cats, and humans if eaten in large quantities. Is Butterfly Weed a Perennial? Yes, butterfly weed is a long-lived herbaceous perennial. The foliage dies back completely to the ground after the first hard winter freeze, and new shoots emerge in late spring. Because it develops a long, sensitive taproot, established plants can live for over 10 years in the same location. Is Butterfly Weed Invasive? No. Butterfly weed is a non-invasive native plant. While it can reseed in nearby sunny spots, it does not spread invasively or push out native vegetation. Planting, Growing & Care Guidelines Should I Grow Butterfly Weed? You should grow butterfly weed if you have a sunny spot with fast-draining soil and want an easy-care, native perennial that attracts wildlife. It is an ideal choice for rock gardens, native plant borders, and meadow landscapes. Avoid planting it in heavy, poorly-draining clay or fully shaded areas. How Do You Plant Butterfly Weed? Choose the Location: Select a site with full sun (at least 6 hours of direct sunlight) and fast-draining soil. Dig the Hole: Dig a hole twice as wide as the nursery container and equal in depth. Handle Taproots Carefully: Gently remove the seedling from its pot without disturbing the sensitive central taproot. Position & Backfill: Place the plant so the top of the root ball sits flush with the surrounding soil. Fill in with native soil and press down gently. Water In: Water thoroughly to settle the soil. Continue watering weekly until established. Light Full sun is non-negotiable. Planting butterfly weed in partial shade leads to weak, floppy stems and reduced bloom counts. Soil Asclepias tuberosa thrives in lean, dry, sandy, gravelly, or loam soils. High fertility is unnecessary; rich soil causes leggy growth. Excellent drainage is vital—consistently wet soil causes taproot rot. Water Water young plants regularly during their first season. Once established (usually after year one), butterfly weed needs no supplemental watering except during extreme, multi-week droughts. Fertilizer Do not fertilize butterfly weed. Excess nitrogen inhibits flowering and promotes weak foliage growth. Pruning & Fall Clean-Up for Butterfly Milkweed Leave dried seed pods and stems intact through fall and winter to provide shelter for overwintering beneficial insects. Cut dead stems down to ground level in late winter or early spring before new growth appears. Managing Pests (Oleander Aphids) In mid-to-late summer, bright yellow Oleander Aphids frequently cluster on stems and seed pods. How to Handle Do not use chemical insecticides or systemic sprays, as these will kill Monarch caterpillars. Instead, knock aphids off with a sharp spray of water from a garden hose or squish small colonies by hand using gardening gloves. Natural predators like ladybugs and lacewings will soon arrive to balance the population. Bloom Time, Size & Hardiness What Is the Butterfly Weed Bloom Time? Butterfly weed typically blooms from early June through late August. Deadheading early faded flowers can encourage a light second flush of blooms in early autumn, though leaving late blooms allows decorative seed pods to form. What Is the Butterfly Weed Zone? Butterfly weed is cold-hardy across USDA Zones 3 through 9, making it adaptable to almost every region in North America. How Tall Does Butterfly Weed Get? Mature plants reach 1.5 to 3 feet tall with a spread of 1.5 to 2 feet wide. Its compact growth habit prevents it from flopping over neighboring perennials. Butterfly Milkweed Propagation How Can I Propagate Butterfly Weed? Butterfly weed is best propagated by seed. Division is generally unsuccessful because mature plants possess a single, deep central taproot that snaps easily when disturbed. Can I Grow Butterfly Weed From Seed? Yes, but seeds require cold, moist stratification to break dormancy. Outdoor Sowing (Easiest): Direct-sow seeds in autumn. Natural winter snow and rain cycles break seed dormancy for spring germination. Indoor Sowing: Mix seeds with moist sand or a damp paper towel and refrigerate for 30 days before planting indoors under grow lights. Note for Beginners Seed-grown butterfly weed takes 2 to 3 years to develop a mature root system and produce its first major flush of flowers. How Do You Harvest Butterfly Weed Seeds? Monitor green seed pods in late summer or early autumn. Wait until the pods turn dry, brown, and split naturally along their side seam. Gently open the pod and strip the brown seeds away from their silky white parachutes. Store dry seeds in a paper envelope in a cool, dark location until planting. Grow a Monarch Sanctuary Butterfly weed (Asclepias tuberosa) delivers unmatched ecological value and bright summer color with minimal effort — a resilient native perennial that returns year after year while giving Monarch butterflies a crucial sanctuary in your backyard. Transform your landscape with vibrant, low-maintenance native color! Order your high-quality Butterfly Weed (Asclepias tuberosa) live plants today, and start building your ultimate pollinator sanctuary this season. Butterfly Weed for Sale
Learn more
Belgian Mums: Care, Growing and Winter Guide
As summer flowers begin to fade and autumn takes hold, Belgian Mums deliver an unmatched wave of rich fall color. Bred specifically for high flower density and a compact, spherical shape, these garden chrysanthemums (Chrysanthemum × morifolium) come in shades of yellow, orange, red, pink, white, purple, and bronze. Whether used for high-impact porch container displays or planted in garden beds as fall perennials, Belgian Mums provide weeks of vibrant beauty. Here is your complete guide to growing, blooming, and overwintering Belgian Mums. [productList] Quick Care Overview Botanic Name: Chrysanthemum × morifolium (Belgian Breeding / Gediflora) Common Names: Belgian Mum, Garden Chrysanthemum, Fall Mum, Hardy Mum Plant Type: Tender Perennial (often grown as a seasonal annual) Mature Size: 1.5–3 ft. tall, 1.5–3 ft. wide Sun Exposure: Full Sun (6+ hours of direct light daily) Soil Type: Fertile, organic-rich, well-draining soil Soil pH: Slightly acidic to neutral (6.0–7.0) Bloom Window: Late Summer through Late Autumn Flower Colors: Yellow, Orange, Red, Pink, Purple, White, Bronze Hardiness Zones: USDA Zones 5a–9b (when established early) Special Traits: Naturally Dome-Shaped, Flexible Stems, No Pinching Required What Are Belgian Mums? Belgian Mums are specialized garden chrysanthemums bred for extreme branch density, flexible stems, and a naturally rounded growth habit. Developed originally by Gediflora in Belgium, a single plant produces up to 2,000 compact flower buds that bloom together to form a solid ball of color. Unlike traditional chrysanthemums, Belgian Mums do not require hand-pinching during early summer to achieve a bushy shape. Their pliable stems resist snapping off during autumn rain and windstorms, making them superior choices for garden displays. Mature plants typically reach 1.5 to 3 feet tall and wide depending on the cultivar. Do Belgian Mums Need Pinching? No, Belgian Mums do not need pinching. They are genetically selected to branch out naturally without manual trimming. For gardeners, this means zero early-season pruning work while enjoying a perfectly symmetrical, round flower dome in fall. Planting & Location Requirements Are Belgian Mums Better in Pots or in the Ground? Belgian Mums thrive in both containers and garden beds, but your long-term goal dictates the best location: Potted Mums: Best for instant, flexible fall decor on porches, patios, and entryways. Potted mums require more frequent watering and are generally treated as temporary seasonal annuals. In-Ground Mums: Ideal if you want your mums to act as returning perennials. Ground planting gives roots space to expand and offers better insulation against freezing winter temperatures. Do Belgian Mums Need Sun or Shade? Belgian Mums need full sun, receiving at least six hours of direct sunlight each day. Full sun encourages strong stems and triggers heavy flower production. Planting in shade leads to leggy stems, floppy growth, and fewer open blooms. Night-Lighting Warning (Photoperiodism): Chrysanthemums set flower buds based on night length. Never plant or place mums directly beneath bright streetlights, floodlights, or porch lights. Artificial nighttime light tricks the plant into thinking it is daytime, delaying or completely preventing flowering. What Kind of Soil Do Belgian Mums Need? Belgian Mums need rich, fertile, well-draining soil rich in organic matter. While they require consistent moisture, their roots rot easily in waterlogged conditions. For potted mums, use a high-quality commercial potting mix and ensure the container has generous drainage holes. Care, Watering & Health How Do You Care for Belgian Mums? Caring for Belgian Mums requires full sun, consistent moisture, well-drained soil, and proper watering techniques. Check container soil daily, as potted mums dry out rapidly in autumn winds. Should You Water Potted Mums Every Day? You should check potted Belgian Mums daily, but only water when the top inch of soil feels dry. During hot, windy autumn days, potted mums may require daily watering. Always water thoroughly until moisture drains from the bottom of the pot. Pro Tip for Gardeners: Horticulturists refer to a dense foliage canopy as an "umbrella canopy." To ensure moisture actually reaches the root system without triggering fungal diseases, water directly at the soil line or use bottom-irrigation. How Do You Fertilize Belgian Mums? Give Belgian Mums a balanced, water-soluble fertilizer every two weeks during their active growing season while leaves and flower buds are developing. Stop fertilizing completely as soon as the flower buds begin to show color. Applying fertilizer to a plant in full bloom causes the open flowers to age and drop prematurely. What Are Common Problems With Belgian Mums? Common issues include aphids, spider mites, powdery mildew, and fungal leaf spot. Prevent disease by watering at the soil level rather than wetting the foliage, and space plants 18 to 24 inches apart to ensure good air circulation. Managing Blooms When Do Belgian Mums Bloom? Belgian Mums bloom from late August through November, depending on the variety. Cultivars are categorized into early-, mid-, and late-season varieties, allowing gardeners to stagger plants for continuous fall color. How Long Do Belgian Mums Bloom? A Belgian Mum typically stays in bloom for three to six weeks. The display length depends on weather conditions and the bloom stage at purchase. To maximize bloom time in your yard, buy plants that have 20% open flowers and 80% tightly closed, colorful buds. How Do You Keep Belgian Mums Blooming? Provide Full Sun: Keep plants in bright light to maintain flower color. Keep Soil Moist: Avoid severe wilting, which causes unopened flower buds to dry up and drop off. Protect From Extreme Heat: Move potted mums into afternoon shade or a covered porch on unseasonably hot fall days to prevent flower fading. Deadhead Faded Flowers: Gently snip off dead blossoms to keep the plant looking clean and allow light to reach lower buds. Popular Varieties Belgian Mums are available in dozens of named cultivars bred for specific colors and bloom windows: Conaco Orange: Deep, rich orange flowers with exceptional weather tolerance. Conella Yellow: Bright, clear yellow blooms on a dense, medium-sized mound. Viviana Yellow: Showy yellow daisy-style blooms with distinct centers. Margo White: Crisp white flowers featuring subtle yellow centers. Savona: Striking dark red blooms that resist fading in bright sun. Pavia Red: A popular late-season cultivar with dark burgundy-red flowers. Indoor vs. Outdoor Growing Are Belgian Mums Indoor or Outdoor Plants? Belgian Mums are outdoor plants. While you can bring a blooming potted mum indoors as temporary room decor for one to two weeks, long-term indoor survival is poor. Indoor spaces lack sufficient direct sunlight, and dry home heating causes leaves and flower buds to drop rapidly. If kept indoors, place the pot in your sunniest window and check soil moisture daily. Overwintering & Hardiness Are Belgian Mums Annual or Perennial? Belgian Mums are technically hardy perennials (USDA Zones 5a–9b), but they are frequently grown as annuals. Their survival depends on when they are planted: Fall-Planted Mums (Annual Behavior): Mums purchased in full bloom during September or October spend all their energy on flowers rather than roots. They rarely establish deep enough roots before the ground freezes and usually freeze over winter. Spring-Planted Mums (Perennial Behavior): Mums planted in early spring or early summer spend months building deep root systems, allowing them to return reliably every year. Do Belgian Mums Come Back Every Year? Belgian Mums will come back every year if they are planted in the ground early in the season, given good drainage, and properly winterized in cold climates. Potted mums left outdoors in winter will freeze and die because container roots lack soil insulation. Belgian Mums Winter Care Step-by-Step To give ground-planted Belgian Mums the best chance of surviving cold winters: Do NOT Prune in Fall: Leave dead brown foliage and stems intact through winter. The old stems shield the central root crown from severe frost and icy winds. Apply Heavy Mulch: After the first hard freeze, cover the base of the plant with 3 to 4 inches of shredded bark, straw, or evergreen boughs. Ensure Winter Drainage: Never plant mums in low spots where water pools. Wet winter soil rots dormant roots faster than sub-zero temperatures. Prune in Spring: Cut back dead stems to ground level in early spring when new green shoots emerge from the soil. Final Thoughts Belgian Mums provide a vibrant finale to the gardening season. By giving them full sun, soil-level watering, and proper drainage, you can enjoy weeks of brilliant autumn color. If you want them to return next spring, plant early in the season to build deep roots before winter arrives. Start building your autumn color display today! Browse our collection of healthy, bud-packed Belgian Mums and other fall beauties to get your yard season-ready.
Learn more
Types Of Honey and Their Flavor Profile
Honey may look simple at first glance, but there is far more going on than just sweetness. Its taste, aroma, color, and texture all change depending on the plants bees visit, where those plants grow, and the season the honey is harvested. In this guide, we explore the many types of honey, explain what gives each one its character, and look at how specific plants influence flavor. Along the way, you will see why some honeys are common, others are rare, and how visual cues and texture can hint at what you are about to taste. By the end, you will have a clearer sense of why one honey feels light and floral while another tastes deep and bold, and how these differences come from nature itself rather than processing. Does Honey Come in Different Tastes? Yes, honey comes in many different tastes, and that is completely natural. Even though all honey is sweet, the type of sweetness can change depending on which plants the bees visit. Every flower produces nectar with its own mix of natural sugars and aroma compounds. When bees spend more time on one type of flower, those characteristics tend to show up in the honey. That is why some honeys taste light and floral, others feel fruity or citrusy, and some come across as deep, earthy, or bold. One easy way to think about honey flavor is in layers: What you notice first: the main impression, such as floral, fruity, or rich What develops next: softer background notes like citrus, vanilla, herbs, or spice How it finishes: whether the flavor fades quickly or lingers on the palate Soil conditions, weather patterns, and harvest timing can also influence how honey tastes. Because of this, even the same type of honey can vary slightly from one region to another. In many ways, honey behaves more like coffee or wine than a simple sweetener, carrying subtle clues about where it comes from. Types of Honey Honey is not a single, fixed flavor. It changes based on what the bees feed on and what is blooming around them. Broadly, honey falls into two main categories: monofloral honey, which comes mostly from one plant, and polyfloral (wildflower) honey, which comes from many different plant sources. Monofloral Honey Monofloral honey is made primarily from one specific plant or flower. While it is never 100 percent pure, because bees will always visit nearby blooms, one dominant plant usually shapes the honey’s overall character. That dominant source is what gives monofloral honey its recognizable flavor, aroma, and appearance. Because producing monofloral honey depends on a single bloom, careful timing, and the right growing conditions, it is often rarer and more sought after than other types of honey. Limited harvest windows and specific regions can also make it more expensive. Blossomdale’s Organic Raw Blueberry Honey is a good example of a monofloral honey. It reflects the natural nectar of blueberry blossoms, resulting in gentle berry‑floral notes rather than a generic sweetness. Monofloral honeys are valued for: Clear, easy-to-recognize flavor profiles Consistent color, aroma, and texture A strong connection to a specific plant source [productList] Polyfloral (Wildflower) Honey Polyfloral, or wildflower, honey comes from many different plants growing in the same area. Instead of concentrating on one blossom, bees move freely between flowers, herbs, and trees as they forage. Because of this mixed sourcing, wildflower honey is generally less rare than monofloral honey, but it is still highly popular. Its character can change noticeably depending on the season and the landscape where it is produced. Wildflower honeys are often grouped in two simple ways: by season and by location. For example, late-season or autumn wildflower honeys, such as Blossomdale’s Black Organic Raw Honey, are typically harvested after summer blooms fade. During this time, bees may turn to hardier, late-flowering plants, which can result in a darker color and deeper, earthier flavor compared to spring or summer varieties. Wildflower honey often reflects: Local plant diversity Seasonal bloom patterns Environmental conditions While wildflower honey is often more affordable than monofloral honey, certain harvests can still be more expensive due to short bloom periods, specific regions, or limited seasonal availability. Type of Monofloral Honey There are many types of monofloral honey, and each one is crafted around a single plant or flower. Because every blossom has its own nectar makeup, each monofloral honey develops a unique flavor, aroma, color, and texture. Rare Monofloral Honeys Cherry Blossom Honey Cherry blossom honey is a rare and delicate monofloral honey known for its refined, elegant character. It is often produced from both ornamental cherry blossoms and fruiting cherry varieties such as Royal Rainier cherry trees and Bing cherry trees. These trees tend to produce nectar with soft floral aromatics and very little bitterness, which helps shape the honey’s gentle profile. It is best recognized for its light floral sweetness, subtle almond-like notes, and soft, clean finish rather than bold intensity. This honey reflects the gentle nature of cherry blossoms, making it especially appealing to those who prefer mild, nuanced flavors. Because of its subtle profile, cherry blossom honey is often used as a finishing honey in teas, pastries, light desserts, or drizzled over fresh fruit and yogurt, where it enhances flavor without overpowering it. How it’s made: Bees collect nectar during the short cherry blossom bloom, which lasts only a few weeks each year. Where it’s produced: Cherry blossom honey is produced in regions where cherry trees grow in large numbers, especially Japan (including areas such as Nagano and Hokkaido), South Korea (notably mountainous regions with dense cherry blossom growth), and select parts of the United States, particularly Washington and Oregon. Small, limited harvests also come from European cherry-growing regions such as northern Italy, Spain’s Jerte Valley, and parts of Eastern Europe, where production is typically small and seasonal. Flavor profile: Dominant: Light floral sweetness Secondary notes: Almond, soft fruit, faint vanilla Finish: Clean and delicate, not heavy Physical characteristics: Color: Very light amber to pale gold Texture: Smooth and fluid, with a light, silky mouthfeel that pours easily and feels clean rather than heavy on the palate Crystallization: Slow Rarity: High. Short bloom season and limited production make this honey difficult and expensive to obtain. Apricot Blossom Honey Apricot blossom honey is also a rare honey and a gently sweet, fruit-forward honey known for its soft and approachable character, often produced from traditional apricot varieties such as Harcot Apricot and Moorpark Apricot trees. It carries a mild floral sweetness with subtle stone‑fruit notes that echo the aroma of fresh apricots, making it easy to enjoy even for people new to specialty honey. Its unique identity comes from apricot trees, which produce nectar rich in light fruit sugars and delicate floral compounds. Because of its balanced profile, apricot honey is often used in teas, breakfast foods, baked goods, and light desserts, where it adds sweetness without overpowering other flavors. How it’s made: Bees forage almost exclusively on apricot blossoms during early spring. Where it’s produced: Apricot blossom honey is produced in regions with established apricot orchards, particularly Bulgaria and Greece, where traditional apricot cultivation supports small, seasonal blossom honey harvests. Additional production occurs in Turkey (notably the Malatya region), Armenia, and parts of Central Asia, with limited seasonal harvests also found in Italy, Spain, and select areas of the United States, including Oregon and California. Flavor profile: Dominant: Mild fruity sweetness Secondary notes: Stone fruit, floral nectar Finish: Soft and rounded Physical characteristics: Color: Light amber Texture: Medium viscosity, meaning it pours steadily without being too thin or too thick, striking a balance between smooth flow and a slightly substantial feel Crystallization: Moderate Rarity: Moderate to high. Depends on concentrated apricot orchards and timing. Monofloral Plum Honey Plum blossom honey is a monofloral honey that has a soft, gentle fruit character that reflects the nectar of plum blossoms, often sourced from select varieties such as Emerald plum trees. It is known for its light sweetness with a subtle tart edge, giving it a slightly brighter profile than many other stone‑fruit honeys. Its unique identity comes from plum trees, whose blossoms produce nectar with delicate floral aromas and mild natural acidity. Because of this balance, plum honey is often enjoyed in teas, light desserts, yogurt, or simply drizzled over bread, where its flavor adds interest without becoming overpowering. How it’s made: Nectar collected from plum blossoms in early spring. Where it’s produced: Plum blossom honey is most commonly produced in Eastern Europe, particularly across the Carpathian region, where plum trees are widely grown and traditional beekeeping is common. Smaller, seasonal harvests are also found in parts of the United States, including California and Hawaii, where plum varieties bloom early and allow short nectar‑collection periods. Flavor profile: Dominant: Floral sweetness Secondary notes: Light tart fruit, honeyed blossom Finish: Slightly tangy Physical characteristics: Color: Pale amber Texture: Smooth Crystallization: Medium-fast Rarity: High due to short bloom windows. Dandelion Honey Dandelion honey is monofloral honey with a bold, distinctive flavor made from the nectar of dandelion flowers. Unlike delicate blossom honeys, it is known for its strong personality, offering a deeper, more herbal sweetness that stands out immediately. Its unique identity comes from dandelion plants themselves, which produce nectar with naturally bitter and green undertones. Because of this, dandelion honey is often used in small amounts in teas, herbal preparations, or as a natural sweetener where a stronger flavor is desired rather than subtle sweetness. How it’s made: Bees gather nectar from widespread dandelion blooms in spring. Where it’s produced: Dandelion honey is commonly produced in regions where dandelions grow abundantly in open fields and meadows. In the United States, it is especially associated with the Upper Midwest, including Minnesota, where dandelions bloom heavily in spring. Outside the U.S., dandelion honey is also produced in New Zealand and across parts of Europe, including Italy, Lithuainia, France, the United Kingdom, and Germany, where cool spring climates support strong dandelion nectar flows. Flavor profile: Dominant: Bold herbal sweetness Secondary notes: Floral bitterness, green notes Physical characteristics: Color: Bright yellow to golden Texture: Thick, with a dense, slow‑pouring consistency that feels rich and heavy, coating the spoon rather than flowing quickly Crystallization: Fast Rarity: Moderate. Easy to produce but strong flavor limits popularity. Acacia Honey Acacia honey is one of the lightest and most delicate monofloral honeys available, prized for its clean taste and refined simplicity. It is known for its very mild sweetness, subtle floral aroma, and smooth finish, making it especially appealing to those who prefer honey without strong or overpowering flavors. Its unique identity comes from acacia trees, often referred to as black locust trees, whose nectar is high in fructose and low in bitterness. Because of this composition, acacia honey is commonly used in tea, coffee, dressings, and desserts where a gentle sweetness is desired without altering the original flavor of the food. How it’s made: Nectar collected from acacia (black locust) trees. Where it’s produced: Acacia honey is most famously produced in Central and Eastern Europe, particularly Hungary, which is considered one of the world’s leading sources due to its large black locust forests. It is also produced in Italy, especially in northern regions where acacia trees bloom in spring. In the United States, acacia honey comes primarily from the Appalachian region, where black locust trees grow naturally and provide short but concentrated nectar flows. Flavor profile: Dominant: Clean, mild sweetness Secondary notes: Vanilla, light floral Physical characteristics: Color: Almost clear Texture: Very fluid Crystallization: Very slow Rarity: Moderate, highly valued. Buckwheat Honey Monofloral buckwheat honey is one of the darkest and most intense honeys available, known for its bold, robust character. Unlike light floral honeys, it delivers a deep, rich sweetness that many people compare to molasses or malt, making it a favorite among those who enjoy strong, full-bodied flavors. Its unique identity comes from buckwheat plants, which produce nectar high in minerals and complex sugars. Because of its strength, buckwheat honey is often used in baking, marinades, sauces, and as a natural sweetener where a pronounced honey flavor is desired rather than subtle sweetness. How it’s made: Bees forage on buckwheat blossoms. Where it’s produced: Buckwheat honey is produced in regions where buckwheat is widely cultivated as a grain crop. In the United States, this includes the Midwest and parts of the Northeast, where buckwheat is grown seasonally. It is also produced across Canada, particularly in agricultural regions with cool summers. In Europe, notable sources include France (especially the Limousin region), Germany, Italy, and parts of Eastern Europe, while Russia remains one of the largest producers due to extensive buckwheat farming. Smaller but established production also exists in parts of China, where buckwheat is traditionally cultivated in higher‑altitude regions. Flavor profile: Dominant: Strong, molasses-like Secondary notes: Malt, earth, spice Physical characteristics: Color: Dark brown Texture: Thick Crystallization: Slow Rarity: Moderate. Poison Oak Honey Poison oak honey is an uncommon monofloral honey that often surprises people by its name alone. Despite coming from poison oak plants, the honey itself is completely safe to consume and does not carry the plant’s toxic properties. Instead, it is known for its mild, balanced sweetness and understated character. Its unique identity comes from poison oak shrubs, which produce nectar with soft floral and subtle woody notes. Because of its gentle profile, poison oak honey is typically used as an everyday table honey, in teas, or as a light drizzle over simple foods where a neutral but distinctive sweetness is appreciated. How it’s made: Bees collect nectar from poison oak flowers (safe for humans). Where it’s produced: Poison oak honey is produced in select parts of the U.S. West Coast, primarily in California and Oregon, where poison oak grows naturally in woodland areas, coastal ranges, and foothills. Production is highly localized and seasonal, depending on the presence of flowering poison oak and controlled hive placement. Flavor profile: Dominant: Mild floral Secondary notes: Herbal, woody Physical characteristics: Color: Amber Texture: Medium Rarity: High due to limited regions. Common Monofloral Honeys Clover Honey Clover honey is one of the most widely recognized and commonly consumed monofloral honeys. It is known for its mild, clean sweetness and neutral flavor, which makes it a familiar and approachable option for everyday use. Its unique identity comes from clover plants, which produce nectar that results in a smooth, balanced honey without strong floral or fruity notes. Because of its gentle profile, clover honey is often used as a general-purpose sweetener in tea, coffee, baking, and table use. Where produced: Clover honey is widely produced in regions where clover grows naturally in open fields and pastures. In the United States and Canada, it is commonly harvested across agricultural areas with large grazing lands, especially in the Midwest and Prairie regions. New Zealand is also a major producer, where clover-rich pastures support consistent, large-scale honey production. Flavor profile: Dominant: Mild, classic sweetness Physical characteristics: Color: Light amber Texture: Smooth and medium-bodied, flowing easily without being too thin or overly thick Rarity: Very common Apple Blossom Honey Apple blossom honey is a lightly sweet, floral-fruity honey that reflects the delicate nectar of apple tree blossoms. It is known for its gentle sweetness with a soft fruity note and a faint tart edge, giving it a fresh and clean character. Its unique identity comes from apple trees—often including well-known orchard varieties such as Jonagold, Pink Lady, and Honeycrisp—whose blossoms produce nectar with subtle fruit acids and floral aromas. Because of this balanced profile, apple blossom honey is often used in teas, light baking, salad dressings, or drizzled over yogurt and fresh fruit, where it adds sweetness without overpowering other flavors. Where produced: Apple blossom honey is produced in regions with extensive apple orchards. In the United States, this includes states such as Washington, New York, Michigan, and parts of Pennsylvania, where apple farming is widespread. In Europe, it is commonly produced in countries with strong apple-growing traditions, including France, Germany, Italy, and Eastern European regions, where spring apple blossoms provide short but concentrated nectar flows. Flavor profile: Dominant: Fruity, floral Secondary notes: Light tartness Physical characteristics: Color: Light amber Texture: Smooth and light-bodied, flowing easily without feeling heavy Crystallization: Moderate, forming fine crystals gradually over time Rarity: Common Raspberry Blossom Honey Raspberry blossom honey is a lightly sweet, aromatic honey with a soft berry and floral character. It has a gentle sweetness with subtle fruit notes, which makes it feel brighter and more fragrant than many everyday table honeys. This honey gets its personality from raspberry plants, whose blossoms produce nectar with delicate berry undertones and light floral aromatics. The result is a balanced, pleasant honey that feels easy to enjoy without being overpowering. It is commonly used in teas, desserts, breakfast foods, or simply drizzled over yogurt or toast. Where produced: Raspberry blossom honey is most often produced in the Pacific Northwest of the United States, including Washington, Oregon, and parts of Idaho, where raspberry farms and wild brambles bloom heavily in spring and early summer. In Europe, it is produced in regions with established raspberry cultivation, particularly Eastern Europe, Scandinavia, and parts of Germany and Poland. Blueberry Blossom Honey Blueberry blossom honey is a lightly sweet monofloral honey known for its gentle floral character and subtle berry influence. Rather than tasting like blueberries themselves, it offers a soft, clean sweetness with delicate fruit and floral notes. Its character comes from blueberry plants, often including cultivated varieties such as Pink Icing Blueberry and Jelly Bean Blueberry. These blossoms tend to produce nectar with mild aromatics instead of strong fruit sugars, which gives the honey its smooth, restrained profile. Because of this, blueberry blossom honey works especially well in teas, oatmeal, yogurt, or as a light finishing drizzle. Where produced: Blueberry blossom honey is most strongly associated with Maine in the United States, where vast wild and cultivated blueberry fields bloom in late spring and early summer. It is also produced across Canada, particularly in Quebec, Nova Scotia, and British Columbia, where blueberry farming and wild growth support reliable seasonal nectar flows. Flavor profile: Dominant: Mild floral sweetness Secondary notes: Subtle berry notes Physical characteristics: Color: Light amber Texture: Smooth and fluid Crystallization: Slow Rarity: Common Orange Blossom Honey Orange blossom honey is a fragrant, aromatic monofloral honey best known for its bright citrus and floral character. It offers a smooth sweetness with fresh orange blossom notes that feel both floral and lightly citrusy, making it one of the most recognizable honeys by aroma alone. This honey comes from citrus trees, primarily orange trees, whose blossoms produce nectar rich in natural citrus aromatics. Because of its lively yet balanced flavor, orange blossom honey is often used in teas, desserts, baked goods, marinades, and as a finishing drizzle where a touch of fragrance can lift the overall dish. Where produced: Orange blossom honey is produced in regions with extensive citrus groves. In the United States, this includes Florida, especially central and southern areas, and California, particularly citrus-growing regions in the Central Valley and Southern California. Outside the U.S., Spain is a major producer, notably in Valencia and Andalusia, where long citrus flowering seasons support consistent nectar flows. Flavor profile: Dominant: Floral citrus sweetness Secondary notes: Fresh orange zest Physical characteristics: Color: Pale gold Texture: Smooth and medium-bodied Crystallization: Moderate Rarity: Common Alfalfa Honey Alfalfa honey is a mild, easy drinking monofloral honey known for its clean sweetness and neutral character. It is often described as smooth and gentle, which makes it one of the most approachable honeys for everyday use. Its flavor comes from alfalfa plants, whose nectar produces a light, uncomplicated sweetness without strong floral or fruity notes. Because it stays out of the way flavor-wise, alfalfa honey is commonly used as a general sweetener in tea, coffee, baking, and cooking when sweetness is needed without changing the overall taste of the dish. Where produced: Alfalfa honey is primarily produced in the Western United States, where alfalfa is widely grown as an agricultural crop. Key producing states include California, Idaho, Montana, Utah, and parts of the Great Plains, where large alfalfa fields provide steady nectar flows during late spring and summer. Flavor profile: Dominant: Mild sweetness Secondary notes: Light herbal notes Physical characteristics: Color: Extra light amber Texture: Smooth and light-bodied Crystallization: Moderate Rarity: Common Types of Wildflower Honey Wildflower honey is made when bees gather nectar from many different plants growing in the same area. Instead of reflecting one specific blossom, it captures whatever is blooming nearby at that moment. Because of this, wildflower honey can vary widely in flavor, color, and intensity, even when it comes from the same region. By Season Looking at wildflower honey by season helps explain why some jars taste light and delicate while others feel bold and full. As the year progresses, different plants come into bloom, and bees naturally work with what is available at that time. Spring Wildflower: Spring wildflower honey is often the first honey harvested after winter. It reflects the earliest blooms of the year, when plants begin flowering quickly as temperatures rise and bees return to active foraging. Possible influences: May include clover, dandelion, fruit blossoms such as apple, cherry, and apricot, along with other early wildflowers Flavor: Light, fresh, and floral, with a clean sweetness that feels gentle on the palate Aroma: Soft florals with subtle green or grassy notes Color: Pale amber to light gold Texture: Smooth and fluid Spring wildflower honey is well suited for people who enjoy mild flavors. It is often used in tea, drizzled over fruit, or enjoyed as an everyday table honey. Summer Wildflower: Summer wildflower honey develops when plant diversity is at its highest. With many flowers, herbs, and wild plants in bloom, bees collect nectar from a wide range of sources, which adds depth and character to the honey. Possible influences: May include herbs, berries, wildflowers, and flowering shrubs Flavor: Richer and more layered, sometimes showing fruity, herbal, or lightly spicy notes Aroma: Fuller and more aromatic than spring varieties Color: Golden to medium amber Texture: Medium-bodied and slightly thicker than spring honey Because of its balance and depth, summer wildflower honey is especially versatile. It works well in cooking and baking and pairs nicely with foods like yogurt, cheese, and warm breads. Autumn Wildflower: Autumn wildflower honey is harvested later in the year, after many delicate blooms have faded. At this point, bees often turn to hardier, late-flowering plants that produce darker, more concentrated nectar. Possible influences: May include goldenrod, aster, and other late-season wild plants Flavor: Deeper and more robust, with earthy notes that may feel slightly herbal or malty Aroma: Warm and full Color: Dark amber to brown Texture: Thicker and denser, with a tendency to crystallize more quickly Autumn wildflower honey appeals to those who enjoy stronger flavors. It is commonly used in baking, marinades, or anywhere a more pronounced honey taste is welcome. By Area When wildflower honey is grouped by area, the focus shifts to the landscape surrounding the hive. Geography plays a quiet but important role in shaping which plants grow nearby, and that, in turn, influences a honey’s flavor, aroma, and overall intensity. Even during the same season, honey can taste noticeably different depending on whether it comes from open plains, higher elevations, or fertile valleys. Prairie Wildflower: Prairie wildflower honey comes from wide, open landscapes where bees may forage across grasses, clover, sunflowers, and other low growing flowering plants common to plains and grassland regions. Possible plant influences: May include grasses, clover, sunflowers, and native prairie blooms Flavor: Typically balanced and mildly sweet, with a clean, straightforward character rather than bold intensity Aroma: Light floral notes with gentle grassy or hay-like hints Color: Often light amber to golden, though this can shift depending on rainfall and bloom density Texture: Smooth and medium-bodied, flowing easily without feeling thin Crystallization: Moderate, often forming fine crystals over time Because prairie landscapes tend to be relatively uniform, the resulting honey often has a consistent and approachable flavor. This makes prairie wildflower honey easy to enjoy as an everyday option, whether stirred into tea or used as a simple table honey. Mountain Wildflower: Mountain wildflower honey is shaped by higher elevations, cooler temperatures, and shorter blooming periods. Bees may gather nectar from a wide range of alpine flowers and herbs that grow in rugged, less predictable terrain. Possible plant influences: May include alpine wildflowers, herbs, and high elevation flowering plants Flavor: Often more layered and complex, with herbal, mineral, or lightly resinous notes Aroma: More pronounced and aromatic, sometimes with fresh or pine-like qualities Color: Ranges from golden to darker amber, depending on altitude and available blooms Texture: Medium to thick, sometimes slightly denser due to higher mineral content Crystallization: Variable and sometimes uneven because of diverse nectar sources Mountain environments, including thinner air, rocky soil, and frequent temperature changes, can affect how nectar develops. Over time, these conditions often contribute to honey with greater depth and a more distinctive personality. Valley Wildflower: Valley wildflower honey comes from fertile lowland areas where bees may forage among fruit trees, flowering weeds, and a mix of agricultural and natural plant life. Possible plant influences: May include fruit blossoms, wild weeds, and mixed flowering plants Flavor: Commonly floral and lightly fruity, with soft sweetness and gentle fruit-forward notes Aroma: Light and fragrant, sometimes carrying fresh or juicy impressions Color: Light to medium amber Texture: Smooth and often slightly fluid Crystallization: Moderate, influenced by the balance of fruit blossom nectar Valley regions tend to support abundant and diverse plant growth. This variety often results in honey that feels rounded, pleasant, and versatile. Wrap Up! Honey is best understood as a reflection of place, season, and the plants surrounding the hive, not as a single, uniform product. Every jar tells a slightly different story shaped by nectar sources, weather, soil, and harvest timing. These factors can influence flavor, aroma, color, texture, and consistency in ways that range from subtle to bold. By learning about different types of honey, from monofloral varieties to seasonal and regional wildflower honeys, it becomes easier to understand why no two honeys are ever exactly the same. Exploring honey is less about chasing rarity and more about paying attention to how bees, plants, and landscape work together to create flavors that feel natural, distinctive, and deeply tied to where they come from.
Learn more
Plant, Pick, and Bake: The Blueberry Guide
Choosing the proper Blueberry variety is key to the start of your blueberry bake off success - read on for our suggestions. 1. Getting Started: Choosing the Right Blueberry Plants Before you begin, you’ll need to decide what type of blueberries you want to grow. There are several excellent varieties to choose from, but for this guide, we’ll focus on two standout options: Chandler and Patriot. Here’s a quick breakdown: Highbush Blueberries – These are the most common variety and are ideal for most climates. They produce large, sweet berries. Chandler and Patriot are both excellent highbush varieties. Chandler: Known for its large, sweet berries, Chandler blueberries are perfect for those looking for an abundant harvest. They are one of the later varieties to ripen, often producing fruit in mid-summer. These berries are extra-large, making them perfect for pies and desserts. Patriot: A very hardy variety that’s perfect for cooler climates. Patriot blueberries are known for their excellent flavor and compact growth. They ripen early in the season and are often the first to produce fruit. This variety is also known for being relatively easy to grow and maintain. Lowbush Blueberries – Smaller and more cold-hardy, lowbush blueberries are perfect for northern climates. Rabbiteye Blueberries – Best suited for warmer climates, these blueberries are tolerant of heat and drought but require cross-pollination for better fruit production. If you’re a beginner, Chandler and Patriot highbush blueberries are great choices. They offer a combination of large fruit, ease of care, and resilience to various climates. They can even be grown in CONTAINERS and yield an excellent harvest. 2. Selecting the Ideal Planting Location Blueberries thrive in areas with: Full Sun: Blueberries need at least 6 hours of sunlight a day to grow well and produce sweet, plump berries. Well-Drained Soil: Blueberries don’t like wet feet. Choose a spot with well-draining soil. You can amend your soil by adding organic matter like compost to improve drainage. Acidic Soil: Blueberries prefer slightly acidic soil with a pH level between 4.5 and 5.5. You can test your soil pH using a simple kit or send a sample to a local gardening center. If your soil is too alkaline, you can lower the pH by adding sulfur or organic material like pine needles. 3. Planting Blueberries Once you’ve chosen your blueberry variety and location, it’s time to plant. Here’s how: Prepare the Soil: Mix in organic matter such as compost or peat moss to make the soil acidic and well-drained. Dig the Holes: Space your blueberry bushes about 18 to 24 inches apart for highbush varieties. Dig a hole that’s twice as wide as the root ball but no deeper. Plant Your Blueberries: Gently remove the plant from its pot and place it in the hole. Ensure that the crown (the top of the root ball) is level with the surrounding soil. Watering: After planting, water the plants thoroughly to help them settle in. Keep the soil consistently moist, especially during dry spells, but avoid waterlogging the plants. 4. Caring for Your Blueberries Once your blueberry plants are in the ground, regular care is essential for healthy growth. Here’s what you need to do: Watering: Blueberries have shallow roots and need consistent moisture. Water them regularly, especially during hot weather. Drip irrigation or soaker hoses are great options as they help keep the soil moist without wetting the foliage. Mulching: Mulch your blueberries with a 2-3 inch layer of pine bark, wood chips, or sawdust. This helps retain moisture, keeps the roots cool, and suppresses weeds. Fertilizing: Blueberries need specific nutrients. Use a fertilizer designed for acid-loving plants (like those for azaleas or rhododendrons). Apply fertilizer in the spring when the new growth begins, and again in late summer. Pruning: Prune your blueberry bushes in early spring, before new growth appears. Remove dead or damaged branches, and thin out some of the older wood to encourage fresh growth. Pruning also helps shape the bush, keeping it manageable and productive. 5. Harvesting Your Blueberries Blueberries typically start bearing fruit in 2-3 years if you’ve planted healthy bushes. However, some varieties may take a little longer to fully mature. Here are some tips on harvesting: Timing: Blueberries ripen over a period of several weeks, so you’ll need to pick them in stages. Wait until they are fully blue and slightly soft to the touch. Unripe berries will be green and firm. Pick Gently: Blueberries are delicate, so pick them carefully by hand. Avoid squishing them, and place them gently into baskets or containers. Freezing: If you have a bountiful harvest, you can freeze blueberries for later use. Simply spread the berries out in a single layer on a baking sheet and freeze them. Once frozen, transfer the berries into a sealed bag or container. 6. Making Blueberry Pie from Your Freshly Harvested Berries Now that you have fresh blueberries, let’s make a classic blueberry pie! Here’s a simple recipe for a homemade blueberry pie using your garden-fresh blueberries. Ingredients: 4 cups of fresh blueberries (or frozen if you're saving them for later) 1 cup granulated sugar 2 tablespoons cornstarch 1 tablespoon lemon juice 1/4 teaspoon ground cinnamon 1 tablespoon unsalted butter 1 package of pie crusts (or homemade, if preferred) 1 egg (for egg wash) 1 tablespoon sugar (for sprinkling on top) Instructions: Preheat the Oven: Set your oven to 425°F (220°C). If you're using a store-bought pie crust, roll it out into a 9-inch pie dish. If you're using homemade crust, make sure to line the pie dish with your crust. Make the Filling: In a large bowl, combine the fresh blueberries, sugar, cornstarch, lemon juice, and cinnamon. Stir gently until the berries are well coated. Assemble the Pie: Pour the blueberry mixture into the prepared pie crust. Dot the filling with small pieces of butter. Roll out the top crust and place it over the berries. Trim the excess crust and crimp the edges together. Cut a few small slits in the top crust to allow steam to escape. Egg Wash and Sugar: Beat the egg and brush it over the top of the pie crust. Sprinkle with a little sugar to create a golden finish. Bake: Bake the pie for 45-50 minutes, or until the crust is golden brown and the filling is bubbling. Keep an eye on the crust—if it starts to get too dark, cover the edges with foil. Cool and Serve: Let the pie cool for at least 1 hour to allow the filling to set. Serve warm with a scoop of vanilla ice cream or whipped cream. 7. Enjoying Your Homemade Blueberry Pie There’s something incredibly satisfying about growing your own blueberries and turning them into a homemade pie. The sweetness of the fresh berries, combined with the buttery, flaky crust, makes for a delightful treat. Whether you're enjoying a slice by yourself or sharing it with loved ones, a homemade blueberry pie is always a hit!
Learn more
Lime Sizzler Firebush: A Guide to This Vibrant Shrub
If you want a shrub that delivers bold foliage and bright flowers while attracting pollinators, Lime Sizzler Firebush is an excellent choice. Its lime-green leaves and red-orange blooms make it visually striking, and it adapts well to gardens of many kinds and sizes. Color and Foliage Contrast: Why ‘Lime Sizzler’ Stands Out This shrub is visually striking because of its vibrant foliage and bright flowers. What is a Lime Sizzler Fire Bush? Lime Sizzler Firebush is a hybrid cultivar of Hamelia patens, bred to produce chartreuse-to-light-green variegated foliage. It also bears red-orange tubular flowers that stand out against the leaves. Its leaves — often with lighter yellowish tones — make it brighter than standard Firebush, adding light and texture to garden beds. Does Lime Sizzler Fire Bush bloom year-round? In warm climates (USDA zones 9–11), it can bloom from late spring through fall, often producing flowers over extended months. In cooler or frost-prone regions, bloom will be limited to the warmer part of the year, but the foliage still provides color — making it reliable for seasonal interest even when not flowering. Firebush Varieties Compared: Lime Sizzler vs. Dwarf vs. Native Hamelia patens Comparing varieties helps you select the best Firebush for your space and style. How fast does Lime Sizzler Fire Bush grow? Lime Sizzler grows moderately; under favorable conditions it typically reaches mature shape within a couple of growing seasons. How big does Lime Sizzler Fire Bush get? Mature plants generally reach about 4–5 feet tall and wide. That makes it more compact and manageable than standard Firebush species, which in ideal (frost-free) conditions may grow taller and wider. Its moderate size is ideal for smaller gardens, containers, hedges, or mass plantings when you want color without overwhelming vertical growth. Designing a Pollinator-Friendly Garden with Firebush as the Centerpiece It attracts hummingbirds, butterflies, and bees, making it ideal for pollinator gardens. Does Lime Sizzler Fire Bush attract butterflies? Yes. Its red-orange tubular flowers are rich in nectar and attract hummingbirds, butterflies, and bees. Beyond providing nectar, the shrub also produces small berries that birds may eat — supporting local wildlife. Because the blooms appear repeatedly through warm months, it serves as a reliable food source in a layered pollinator garden. How to Grow Lime Sizzler Firebush in Containers and Small Spaces Even in limited spaces, this shrub thrives with proper care. How much sun does Lime Sizzler Fire Bush need? Full sun is best — at least 6–8 hours of direct sunlight daily encourages abundant flowering and vivid foliage. In hot climates, light afternoon shade may help protect foliage from scorching. How often should I water Lime Sizzler Fire Bush? When newly planted, water regularly to help roots establish. Once established, it tolerates drier conditions. Deep watering followed by a drying period encourages strong root growth. Can Lime Sizzler Fire Bush grow in shade? It tolerates partial shade, but flowering and leaf color reduce in low light. Full sun produces the brightest foliage and most flowers. For containers: plant in a pot with well-draining soil, ensure drainage holes, and water deeply when the topsoil feels dry. Regular drainage avoids root rot and supports healthy growth even in pots. Low-Water Landscaping with Firebush: Design Ideas for Arid Climates Lime Sizzler Firebush performs well in drought-tolerant landscapes. Is Lime Sizzler Fire Bush drought tolerant? Yes. Once established, it shows moderate to good drought tolerance. It handles heat and humidity well and works in water-wise or xeriscape gardens, especially when planted in well-draining soil and mulched to retain moisture. Deep watering during extended dry spells is beneficial, but overly wet soil should be avoided. Seasonal Transformation: How Firebush Changes Through the Year It offers color and interest across multiple seasons with minimal care. Does Lime Sizzler Fire Bush need fertilizer? A light balanced fertilizer in early spring (and optionally again midway through the growing season) can support healthy growth and abundant flowering. Heavy fertilization is unnecessary and may favor leaf growth over blooms. Can Lime Sizzler Fire Bush survive winter? In warm climates (zones 9–11), it generally remains evergreen or semi-evergreen. In colder areas, frost can kill above-ground growth, but the roots are hardy in milder zones, meaning the plant often regrows from the roots in spring. Seasonal die-back also offers a chance for pruning and reshaping before new growth returns. Common Pests and Problems in Firebush Shrubs (and How to Solve Them Naturally) Lime Sizzler Firebush is hardy but can encounter minor pest issues. What pests affect Lime Sizzler Fire Bush? Occasional pests include scale insects, aphids, and spider mites, especially on new growth or during hot, dry conditions. Prevent issues by maintaining proper soil moisture, ensuring good drainage, and spacing plants adequately to allow air circulation. Regularly inspect foliage and treat early signs of infestation. Natural remedies such as insecticidal soap or neem oil, and encouraging beneficial insects, can control pests without harsh chemicals. Stress-related pest or fungal problems are uncommon if basic care is followed. How to Prune and Shape Lime Sizzler for Maximum Bloom and Balance Light pruning maintains shape and encourages blooms. How do you prune Lime Sizzler Fire Bush? After flowering, remove dead or leggy stems to encourage branching. A gentle trim helps maintain a tidy mound and supports fuller flowering in the next bloom cycle. If the plant becomes overgrown or woody, perform a harder prune in late winter or early spring (before new growth begins). In frost-prone zones, cut back dead stems after frost to ground level — the plant often resprouts from roots in spring. Avoid heavy pruning during peak bloom, as it may reduce flowering that season. The Environmental Benefits of Planting Firebush This shrub supports wildlife and contributes to a sustainable garden ecosystem. Is Lime Sizzler Fire Bush deer resistant? Yes. It is typically not preferred by deer. Besides offering nectar for hummingbirds and butterflies, the species produces small berries that birds may eat — contributing to local biodiversity. Firebush also tolerates heat and drought and adapts to a variety of soils, making it useful for sustainable, low-water landscaping. Used in mass plantings, borders, hedges, or container gardens, Lime Sizzler delivers aesthetic appeal while supporting wildlife and a resilient garden environment.
Learn more

Growing Black Sage in Native Gardens: A Complete Guide to Care and Value
Black Sage is a useful addition to low maintenance native gardens.
Learn more
Growing Cleveland Sage: Everything You Need to Know
Cleveland sage is a versatile low maintenance, drought tolerant plant.
Learn more
Best Shrubs for Edible Landscaping: Fruit Bushes, Herbs, and Low-Maintenance Picks
Edible landscaping becomes easier to manage when edible shrubs take on a central role. These plants create structure, fill space, and produce food without the constant upkeep of seasonal crops. Typical size: 2–6 ft Fruit in: 1–3 seasons Maintenance: Low once established FRUITING SHRUBS WOODY HERBS CANE BERRIES LOW ROSETTES The middle layer of a garden: structure, food, and form in one planting Instead of separating ornamental and edible plants, shrubs allow both to exist in the same space. From fruit-bearing bushes to woody herbs and tropical edibles, these plants form the middle layer of a garden. When used intentionally, they help create a layout that looks complete while staying productive throughout the year. Edible Shrubs to Consider for Landscaping These plants work well in edible landscaping because they stay at a manageable size, produce usable harvests, and help define the structure of a garden. Some are naturally shrubby, while others can be maintained in shrub form with pruning. 01Blueberry Bushes Blueberries are compact, woody shrubs that naturally grow in a rounded form, typically reaching 3 to 6 feet tall and wide depending on the variety. They have shallow root systems and dense branching, which allows them to function well as borders or low hedges. Beyond fruit production, they offer strong seasonal interest, with spring flowers and foliage that can turn red or orange in cooler conditions. Care tip: They require acidic soil (around pH 4.5–5.5) to grow well. Keep the soil consistently moist but not waterlogged, and use mulch to protect their shallow roots. [productList] 02Blackberry Bushes Blackberries grow through arching or trailing canes that can be managed into a shrub-like form. When pruned and supported, they can be kept contained while still producing heavily. Their dense growth makes them useful for informal barriers or filling larger spaces. Care tip: Train canes along a trellis or keep them pruned to maintain shape. Remove canes that have already fruited to make room for new growth. [productList] 03Raspberry Plants Raspberries produce upright canes that emerge from the base each season, giving them a more controlled and vertical form than blackberries. Most varieties grow around 3 to 5 feet tall and spread gradually through underground runners, making them reliable for repeated harvests. Care tip: Cut back old canes after fruiting and thin new growth to prevent crowding. Good airflow helps reduce disease issues. [productList] 04Rosemary Rosemary is a woody evergreen shrub that can grow anywhere from 2 to 5 feet tall depending on how it is maintained. It has needle-like leaves and a dense branching habit, which allows it to be shaped into hedges or left more natural. Its structure stays consistent throughout the year. Care tip: It prefers dry conditions and well-draining soil. Avoid overwatering, and trim regularly to keep it compact and prevent it from becoming too woody. 05Sage Varieties Sage forms a softer, semi-woody shrub that usually grows between 1 to 3 feet tall. Its leaves are broad, slightly fuzzy, and aromatic. Compared to rosemary, it has a looser growth habit, which makes it useful for filling in spaces without creating a rigid structure. Care tip: Plant in well-draining soil and avoid excess moisture. Prune lightly to maintain shape and encourage new growth. [productList] 06Guava Guava is naturally a small tree but can be pruned into a dense shrub that stays within 6 to 10 feet or smaller depending on maintenance. Its fuller canopy gives it more visual weight, making it useful as a focal plant while still producing fruit. Care tip: Regular pruning helps control size and encourages branching. It prefers warm conditions and consistent sunlight for best fruit production. 07Pineapple Pineapple is a low-growing, herbaceous plant that forms a tight rosette of stiff, pointed leaves, usually staying under 3 feet tall and wide. While not a true shrub, it is often used like one in garden design due to its compact form and strong structure. It produces a single fruit from the center of the plant. Care tip: Use well-draining soil and avoid excess water. It thrives in warm temperatures and benefits from occasional feeding during active growth. Quick Reference Typical mature size2–6 ft tall and wide Fastest to fruitRaspberries, blackberries Slowest to fruitBlueberries, 2–3 years Best for warm climatesGuava, pineapple, rosemary Common Questions About Edible Landscaping Shrubs Here's a refined version of those sections. It keeps the answers broad and authoritative, while lightly anchoring to the specific plant types you're featuring without sounding promotional. What are the best shrubs for edible landscaping? The best edible shrubs are those that combine structure, manageable growth, and consistent harvests. Berry-producing shrubs are among the most widely used because they naturally form dense plants while yielding fruit seasonally. Woody herbs also work well, especially those that hold their shape and provide year-round presence in a garden. In warmer regions, certain fruiting plants can be maintained in shrub form, adding both height and productivity. A mix of these plant types helps create a balanced and layered edible landscape. Which fruit bushes are easiest to grow for beginners? Fruit bushes that establish quickly and adapt to a range of conditions tend to be the easiest for beginners. Cane-growing berries are often the most forgiving, as they regenerate regularly and produce reliably with basic care. Bush-form berries are also popular, though some may require more specific soil conditions to perform well. Starting with a few well-spaced plants and focusing on simple pruning and watering routines usually leads to steady results. What edible shrubs grow well in warm climates? Warm climates support a wider range of edible shrubs, including both drought-tolerant herbs and fruiting plants that thrive in heat. Shrubs that can handle longer growing seasons tend to produce more consistently and require less intervention once established. In these conditions, it is common to combine hardy, low-water shrubs with more tropical fruiting varieties to create contrast in both form and function. Proper drainage and sun exposure remain key factors for long-term success. What edible shrubs grow well in small gardens? In smaller spaces, edible shrubs that respond well to pruning and stay naturally compact are the most practical. Plants with controlled growth habits can be shaped to fit borders, containers, or narrow planting beds without overwhelming the layout. Layering different shrub types, from low-growing herbs to slightly taller fruiting plants, helps maximize space while maintaining a clean and intentional design. Are edible shrubs low maintenance? Most edible shrubs become low maintenance once established. During their first growing season, they require regular watering and care, but over time they need only occasional pruning and basic upkeep. How often should you water edible shrubs? Watering depends on the plant type and climate. Most edible shrubs benefit from deep watering, while fruiting shrubs like berries prefer consistent moisture during active growth. Once established, many can tolerate less frequent watering. How big do edible shrubs get? Most edible shrubs grow between 2 to 6 feet tall and wide, depending on the variety and pruning. Some plants can grow larger if left unmaintained, but they are typically kept within this range in landscape settings. How long do edible shrubs take to produce fruit? Many edible shrubs begin producing within one to two growing seasons. Raspberries and blackberries often fruit quickly, while blueberries may take two to three years to reach full production. Do edible shrubs produce every year? Most perennial edible shrubs produce annually once established. Yields often increase as the plant matures and becomes more established in its environment. Want This in Your Own Garden? If patience isn't part of the plan, we've got plants ready to plant today — browse the full collection. Browse Our Edible Plant
Learn more
Top 5 Reasons to Buy Native Plants Online for Naturescaping
Gardening with native plants has become a key strategy for sustainable, low-maintenance landscapes. Buying native plants online gives you access to a wide selection of species adapted to your region, supports wildlife, and reduces environmental impact. Here are the top five reasons why native plants are essential for naturescaping success. 1. Native Plants Thrive in Local Landscapes Native plants are uniquely suited to the climate, soil, and seasonal conditions of their region. This makes them resilient and easier to maintain compared with non-native species. They naturally withstand local pests, diseases, and temperature fluctuations, allowing gardeners to create thriving, low-maintenance landscapes. Do native plants require less water and maintenance? Yes. Native plants have adapted to the natural rainfall and temperature patterns of their region. This reduces the need for frequent watering and chemical treatments. Once established, they thrive with minimal intervention, saving gardeners both time and resources. Are native plants more resilient than non-native plants? Native plants have evolved over thousands of years to handle local environmental stresses. They are naturally resistant to regional pests, diseases, and seasonal changes, making them more resilient than non-native species that may require additional care. Which native plants are best for soil health? Plants with deep root systems, such as switchgrass, coneflower, and black-eyed Susan, improve soil structure, prevent erosion, enhance water infiltration, and retain nutrients. These plants support healthy soil ecosystems and reduce the need for fertilizers. 2. Cost and Maintenance Savings Native plants are an investment in both money and effort. Because they are adapted to local conditions, they require less water, fertilizer, and pest control. Over time, this translates into significant cost savings and a lower-maintenance garden. Are native plants cheaper to maintain than non-native plants? Yes. Gardens featuring native plants often have lower maintenance costs due to reduced watering, fertilization, and pest control needs. This makes native landscaping a practical choice for homeowners seeking sustainable savings. How to find native plants for my garden online? Search for regional native plant nurseries or specialized online retailers. Many offer detailed plant descriptions, growth requirements, and starter kits. Ordering online gives access to a larger variety of species than local stores, often at competitive prices. 3. Support Pollinators and Wildlife Native plants play a crucial role in supporting biodiversity. They provide food and shelter for pollinators, birds, and other wildlife, helping maintain balanced ecosystems. By planting native species, you contribute directly to local conservation efforts. How do native plants support wildlife and biodiversity? Native plants supply nectar, pollen, seeds, and shelter for insects, birds, and small mammals. These plants form the foundation of healthy ecosystems, supporting the survival of species that have evolved alongside them. Do native plants attract pollinators? Yes. Pollinators such as bees, butterflies, and hummingbirds rely on native flowers for food. Planting native species like milkweed, goldenrod, and black-eyed Susan ensures consistent pollinator activity and enhances your garden’s ecological value. 4. Reducing Invasive Species Impact Non-native and invasive plants can overwhelm local ecosystems, outcompeting native species and disrupting habitats. Choosing native plants helps maintain ecological balance and prevent environmental damage. What is the difference between native and non-native garden plants? Native plants have naturally evolved in a region and fit into the local ecosystem. Non-native plants are introduced from other areas and may become invasive, reducing biodiversity and harming wildlife habitats. Using native plants preserves the health and balance of local landscapes. 5. Convenience and Access When Buying Online Buying native plants online provides access to a broader selection of species, including region-specific and hard-to-find varieties. Online nurseries make it easy to source plants that match your climate and soil conditions, ensuring higher success rates for your garden. Where can I find native plants for sale online? Several online retailers and plant societies specialize in native species, offering detailed information about growing requirements and regional suitability. Can I buy native plants specific to my region online? Yes. Many nurseries categorize plants by USDA hardiness zones or ecoregions, ensuring that you receive species suited to your local environment. Are there native plant kits available for online purchase? Yes. Native plant kits are designed for specific purposes such as pollinator gardens or starter naturescapes. They often include multiple species with complementary bloom times for easy planting. What should I consider when buying native plants online? Check plant provenance, seller reputation, and shipping practices. Ensure the plants are suitable for your region and follow care instructions carefully to maximize survival and growth. Reasons to Buy Native Plants Online for Naturescaping: Now, you may wonder, why go online to buy native plants? Here's why it's a great idea:
Learn more